


Making learning fun for students can be hard work. You want them to stay interested and remember what they learn. This is where Gimkit comes in to help you. Gimkit is a fun quiz game that makes learning feel like playing. When you host Gimkit games in your classroom, students answer questions and earn points while having a great time.
This guide will teach you everything about hosting Gimkit games. You will learn how to set up your account, create questions, start games, and keep students interested. By the end, you will know how to use this tool to make your lessons more exciting.
What Is Gimkit and Why Should You Use It?
Gimkit is an online learning game made for classrooms. A high school student created it, and now teachers around the world use it every day. The platform works like a game show where students answer questions to earn money. They can then spend this money on special powers and upgrades during the game.
The platform is different from other quiz tools because students do more than just answer questions. They make choices about how to spend their points. This keeps them thinking and planning while they learn. Teachers who use Gimkit say their students pay more attention and remember more information.
Many teachers like Gimkit because it saves time. The system checks answers automatically, so you don’t need to grade everything by hand. You can see right away which students understand the material and which ones need more help. This helps you teach better and give support where it’s needed most.
Getting Started: Creating Your Gimkit Account
Before you can host games, you need to make an account. The process is simple and takes only a few minutes. Here’s what you need to do:
First, go to the Gimkit website at gimkit.com. Look for the “Sign Up” button at the top of the page. Click on it to start making your account.
You will see two choices – you can sign up with your email or use your Google account. Many teachers choose Google because it’s faster and easier. If you use your school email, this might help later if your school buys licenses for teachers.
Fill in your basic information like your name and email address. Create a password that you will remember. Make sure to use your real information because you might need it later for support or upgrades.
After you finish, check your email for a message from Gimkit. Click the link in the email to prove that your account is real. This step keeps the platform safe for everyone.
The free version of Gimkit lets you host games and create question sets. This is great for trying the platform and seeing if it works for your classroom. If you like it and want more features, you can upgrade to a paid plan later. Many teachers start with the free version and upgrade when they use it regularly.
Creating Your First Question Set (Kit)
In Gimkit, question sets are called “kits.” This is the collection of questions that students will answer during the game. Making your first kit is easy and fun.
Log into your account and go to your main page. Look for a button that says “Create Kit” and click on it. You will see a blank page ready for your questions.
Give your kit a clear name that tells you what it’s about. Good names are “Math Chapter 5,” “Spanish Vocabulary Week 3,” or “Science Review Test.” This helps you find the right kit quickly when you have many of them saved.
Now it’s time to add questions. Click the “Add Question” button to start. Type your question in the box that appears. Then add the correct answer below it. You can also add wrong answers for students to choose from. Having 3-4 answer choices works well for most questions.
You can add pictures to your questions to make them more interesting. Click the image icon and upload a photo from your computer. Visual questions work great for subjects like science, geography, or art history.
Keep adding questions until you have enough for your game. Most teachers create 15-25 questions for a standard game. This gives students enough variety without making the kit too long to finish.
If you already have questions on another website or in a file, you can bring them into Gimkit. The platform works with Quizlet and CSV files. This saves you lots of time if you already created questions before.
Choosing the Right Game Mode
Gimkit has many different game modes. Each one changes how students play and learn. Picking the right mode for your lesson makes a big difference.
Classic Mode is the basic way to play. Students answer questions to earn money. They can buy upgrades that help them earn even faster. This mode works well for quick reviews and warm-up activities at the start of class.
Team Mode puts students into groups. The whole team shares their money and works together to win. This is perfect for building teamwork skills. Students help each other and talk about the answers together.
Trust No One is like the game “Among Us.” Most students are regular players, but some are secret “impostors” who try to stop the others. Everyone must answer questions while figuring out who the impostors are. Students love this mode because it adds mystery and excitement to learning.
2D Game Modes include options like snowball fights, fishing games, and racing. Students answer questions to get items or move forward in these mini-games. These modes work best when you have more time, like 20-30 minutes for the activity.
Try different modes to see what your students enjoy most. Some classes love competition, while others prefer working together. You can switch between modes to keep things fresh and interesting.
Setting Up Your Live Game
Once you have a kit ready and picked a game mode, it’s time to start your game. This is where the real fun begins for you and your students.
From your main page, find the kit you want to use. Click the green “Play Live” button next to it. This opens the mode picker where you can see all the game options.
Click on the mode you want to use. You will see it get highlighted with a yellow border. Read the description to make sure it’s what you want. Then click the “Continue” button in the top corner.
Now you see the game settings page. This is where you control how the game works. You can change the time limit, set how much money students start with, and decide which power-ups they can buy.
Most teachers set games to run for 10-15 minutes for quick reviews or 25-30 minutes for bigger activities. You can also choose to let students join late if they have computer problems or arrive to class after you start.
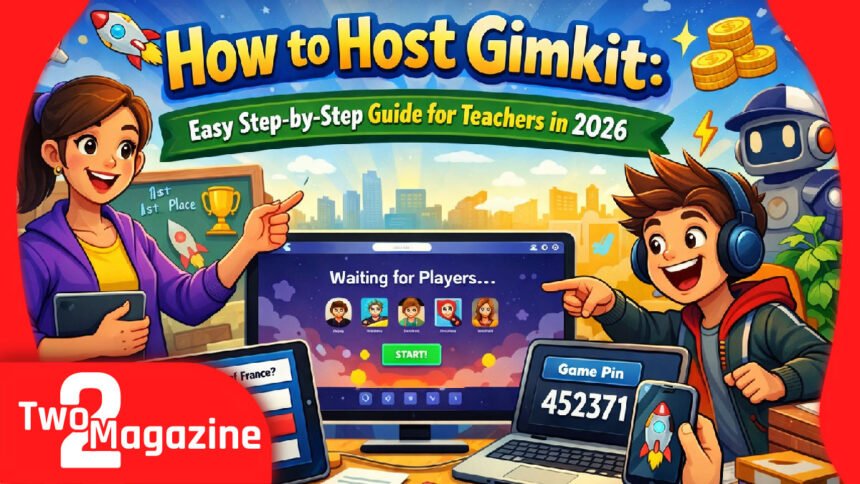
When all your settings look good, click to start the game. Your screen will show a special game code – usually 6 numbers. Students need this code to join your game.
Getting Students Into Your Game
Share the game code with your class. You can write it on the board or show it on your projector screen. Students need to follow these steps to join:
- Open a web browser on their computer, tablet, or phone
- Go to gimkit.com/join (not just gimkit.com)
- Type in the 6-digit game code
- Enter their name when asked
- Wait in the game lobby until you start
You can also use a QR code to help students join faster. When you hover your mouse over the game code on your screen, a QR code appears. Students can scan this with their phones to join right away without typing the code.
If you set up student accounts and classes in Gimkit, your students can use “instant join.” This means they don’t need to enter a code at all. They just go to the website and join automatically. This saves time and prevents problems with students typing the wrong code.
Watch the lobby screen as students join. You will see their names pop up one by one. If someone joins with a silly or wrong name, you can remove them by clicking on their name. This keeps the game clean and professional.
When everyone is in the lobby and ready, click the “Start Game” button. The game begins right away, and students start answering questions.
Managing the Game While It Runs
Your job isn’t done when the game starts. Good game hosting means watching the action and helping when needed.
During the game, you can see a leader board showing who has the most points. This creates excitement as students try to reach the top. You can show this on your projector so everyone can see the competition.
The game controls are in the top corner of your screen. You can use these to pause the game if you need to explain something. You can also add more time if students are really into the game and you want to keep going.
Walk around the room while the game runs. Watch which students are doing well and which ones are struggling. If you see someone getting frustrated, you can offer a quick hint or encouragement.
Some game modes let you watch individual students play. This helps you see exactly what each person is doing. You can learn a lot about who understands the material and who needs more practice.
If technical problems happen, stay calm. Sometimes a student’s device might freeze or disconnect. Have them close their browser and join again with the same game code. The game keeps running for everyone else while you help that one student.
Understanding Game Reports and Data
After your game ends, Gimkit creates a report that shows you everything that happened. This information helps you teach better next time.
The report shows which questions students got right and wrong most often. If many students missed the same question, that tells you the topic needs more teaching time. You can plan your next lesson based on this information.
You can see how each student did individually. This helps you know who understands everything and who needs extra help. Some teachers use this data to create small groups for additional practice.
The reports also show how long students took to answer questions. If someone answered everything very quickly, they might be guessing instead of thinking carefully. If someone took a very long time, they might need help with reading or understanding the questions.
Save these reports to track student progress over time. You can compare reports from different weeks to see if students are learning and getting better. This data is useful for parent meetings and report cards too.
Tips for Running Great Gimkit Games
Here are some helpful ideas from teachers who use Gimkit successfully:
Make Good Questions: Your questions should be clear and match what students learned in class. Don’t make them too easy or too hard. Questions should test understanding, not trick students.
Change Things Up: Don’t use the same game mode every time. Students get bored if you always do the same thing. Try different modes each week to keep the excitement fresh.
Create Class Traditions: Some teachers have special rules or rewards for their Gimkit games. Maybe the winner gets to pick the music during work time, or the top three students get bonus points. These traditions make students look forward to game days.
Use Teams Wisely: When you use team mode, put students in mixed groups. Don’t let friends always team up together. Mix strong students with ones who need help so everyone learns from each other.
Time It Right: Use Gimkit at smart times during class. It works great as a warm-up activity, a review before tests, or a fun Friday activity. Don’t use it every single day or students will get tired of it.
Check Your Technology First: Before class starts, make sure the internet is working and your projector is ready. Test the game with a quick preview to catch any problems with your questions. Being prepared prevents frustration.
Solving Common Problems
Even experienced teachers have problems sometimes. Here are quick fixes for common issues:
Students Can’t Join: Make sure they’re going to gimkit.com/join and not just gimkit.com. Check that they’re typing the game code correctly. If problems continue, have them close their browser completely and try again.
The Game Is Too Easy or Too Hard: You can end the game early and adjust your settings. Change the questions, add more time, or pick a different game mode. It’s okay to stop and start over if needed.
Internet Keeps Cutting Out: If your school’s internet is slow, try using simpler game modes instead of 2D games. These use less internet data. You can also download questions ahead of time when the internet is working better.
Students Are Just Guessing: This happens when they care more about winning than learning. Remind them that wrong answers cost them points. You can also adjust the game settings to give bigger penalties for wrong answers.
Someone Is Cheating: If students are looking at each other’s screens or searching for answers online, pause the game. Remind everyone about honest learning. You can also make questions that require thinking, not just facts that can be looked up quickly.
People Also Read: 7242098265: What This Number Means and Why People Are Searching for It
Using Gimkit for Different Subjects
Gimkit works for almost any subject you teach. Here are ideas for different classes:
Math Teachers: Create kits with calculation problems, word problems, or geometry questions. Use pictures of shapes or graphs to make questions more interesting. Students can practice skills like multiplication, fractions, or algebra while having fun.
Language Teachers: Make vocabulary questions, grammar practice, or reading comprehension activities. You can add audio files to questions for listening practice. This works great for English, Spanish, French, or any language class.
Science Teachers: Use Gimkit for reviewing scientific concepts, vocabulary, or preparing for tests. Add pictures of animals, plants, equipment, or diagrams. Students can learn about cells, chemical reactions, or the solar system through gameplay.
History Teachers: Create questions about dates, important people, or historical events. Add maps or pictures from different time periods. Students learn about the past while competing to win the game.
Other Subjects: Art teachers can ask about famous artists and styles. Music teachers can create questions about composers and musical terms. Physical education teachers can make quizzes about rules, health, or nutrition.
Advanced Features to Try Later
Once you feel comfortable with basic hosting, you can explore these extra features:
Kit Collaboration: Let your students help create questions. Share a special link where they can submit their own questions. You check and approve them before adding to your kit. This gets students thinking deeply about the material.
Assignment Mode: Instead of playing live in class, you can assign kits as homework. Students complete them at home on their own time. You still get all the reports and data to see how they did.
Premium Features: If you upgrade to a paid account, you get access to more game modes and features. You can customize more settings, use all the special game modes, and remove any limits on plays. Many schools buy licenses for their teachers.
Final Thoughts on Hosting Gimkit
Hosting Gimkit games changes the way students learn in your classroom. Instead of quiet worksheets or boring reviews, you create an exciting environment where learning feels like playing. Students pay attention, remember more, and actually enjoy studying.
Start small with simple kits and basic game modes. As you get more comfortable, try new features and different ways of playing. Every class is different, so find what works best for your students.
The most important thing is to have fun with it. Your excitement about the game spreads to your students. When you’re enjoying yourself and the students see learning can be fun, everyone wins.
Remember that Gimkit is a tool to help you teach, not replace your teaching. Use it along with your regular lessons, discussions, and other activities. Mix traditional methods with game-based learning for the best results.
Now that you know how to host Gimkit, it’s time to try it yourself. Create your first kit, pick a game mode, and watch your students get excited about learning. You might be surprised at how much difference it makes in your classroom.
Frequently Asked Questions
1. Is Gimkit really free to use?
Yes, Gimkit offers a free version that works great for most teachers. You can create unlimited kits and host live games with your students without paying anything. The free version has everything you need to get started. Paid plans cost around $5 per month and give you extra features like more game modes and advanced settings, but many teachers use the free version for years without any problems.
2. How many students can join one game?
Gimkit can handle up to 500 students in a single game, though most classrooms have 20-40 students. The platform works well even with large groups because it’s designed for schools. If you’re teaching multiple classes together or hosting a school-wide competition, you can include everyone without technical issues.
3. What devices do students need to play?
Students can play on almost any device – computers, laptops, tablets, Chromebooks, or smartphones. They just need a web browser and internet connection. The game works on different browsers like Chrome, Safari, Firefox, and Edge. No special apps or downloads are needed, which makes it easy for schools with different types of devices.
4. Can I use questions from other teachers?
Yes! Gimkit has a library where teachers share their kits publicly. You can search for topics you teach and copy other teachers’ kits to your account. You can use them exactly as they are or edit them to fit your needs. You can also import questions from Quizlet or upload CSV files if you have questions saved in other formats.
5. What happens if the internet stops working during a game?
If your internet cuts out briefly, the game usually keeps running. Students who are connected stay in the game and can keep playing. If the connection is lost for a long time, you may need to start a new game with a new code. The good news is that Gimkit saves your kits, so you don’t lose your questions. Just start fresh when the internet comes back.
6. How long should a Gimkit game last?
Most teachers run games for 10-15 minutes for quick reviews or 20-30 minutes for longer activities. You set the time limit when you start the game, but you can always add more time during the game if students are really enjoying it. You can also end a game early if needed. Start with shorter games and increase the time as you and your students get more comfortable.
7. Can students play Gimkit at home for homework?
Yes! You can assign kits as homework using “Assignment Mode.” Students complete the questions at home on their own schedule. They still earn points and play the game, but they’re not competing live against classmates. You get reports showing how each student did, just like with live games. This is great for extra practice or make-up work.
8. What if a student joins with a bad or silly name?
You have full control over the game lobby before starting. If a student enters an inappropriate name, you can remove them from the lobby by clicking their name. They can then rejoin with a proper name. Gimkit also has a “Nickname Generator” feature that gives students random safe names automatically, so they can’t choose their own names at all.
9. Do I need to know a lot about technology to use Gimkit?
Not at all! Gimkit is designed to be simple for teachers who aren’t tech experts. If you can use email and browse websites, you can use Gimkit. The interface is clear and easy to understand. Most teachers figure out the basics in 15-20 minutes. There are also lots of help articles and videos if you get stuck on something.
10. How is Gimkit different from other quiz games like Kahoot?
While both are quiz games, Gimkit gives students more control over their experience. In Kahoot, students just answer questions and get points. In Gimkit, students earn money and make choices about how to spend it on upgrades and powers. This adds strategy and keeps students thinking throughout the entire game. Gimkit also has more variety in game modes, giving you more options for different types of lessons.
Read Next: Who Is Tomleonessa679? The Story Behind This Popular Online Name